---
title: "聊聊 Java 的单元测试"
description: "单元测试框架Java 中,JUnit 和 TestNG 是最受欢迎的单元测试框架。JUnitTestNGJU"
date: 2022-08-02T13:13:24Z
canonical: https://xiaobox.github.io/p/2022-08-02-liao-liao-java-de-dan-yuan-ce-shi/
author: 小盒子
categories: ["后端"]
tags: ["Java", "JVM", "Spring"]
source: https://mp.weixin.qq.com/s/xL8O0_KPJSCA4khMgb_7pQ
license: CC BY-NC-SA 4.0
license_url: https://creativecommons.org/licenses/by-nc-sa/4.0/
---
# 聊聊 Java 的单元测试
## 单元测试框架
Java 中,`JUnit` 和 `TestNG` 是最受欢迎的单元测试框架。
- JUnit
- TestNG
## JUnit
首先是大名鼎鼎的 JUnit ,**JUnit 已经成为 Java 应用程序单元测试的事实标准**。
JUnit 是一个开源的 Java 语言的单元测试框架,专门针对 Java 设计,使用最广泛。JUnit 目前最新版本是 5
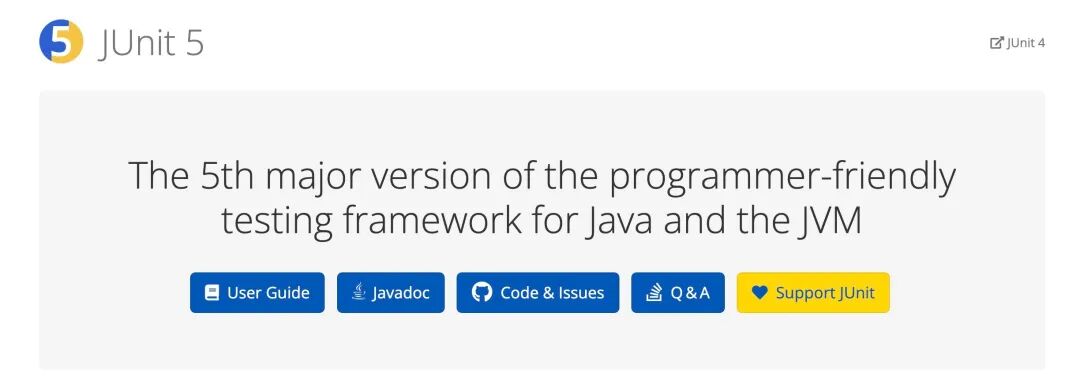
JUnit5 的组成:JUnit 5 = **JUnit Platform** + **JUnit Jupiter** + **JUnit Vintage**
JUnit5 建议使用 Java8 及以上版本
- **JUnit Platform** 是在 JVM 上启动测试框架的基础,它定义了`TestEngine`在平台运行的新测试框架的 API
- **JUnit Jupiter** 它用于编写测试代码的新的编程和扩展模型。它具有所有新的 Junit 注释和`TestEngine`实现来运行这些注释编写的测试。
- ***JUnit Vintage*** JUnit4 已经存在了很长时间,并且有许多以 JUnit4 编写的测试。JUnit Jupiter 还需要支持这些测试。为此,开发了 JUnit Vintage 子项目。提供了一个测试引擎,用于在平台上运行基于 JUnit 3 和 JUnit 4 的测试。它要求 JUnit 4.12 或更高版本出现在类路径或模块路径中。从它的名字 Vintage(古老的;古色古香的)中也能有所体会。
### 简单例子
我们先来个最简单的例子,别看简单,很多人会犯错
```java
@SpringBootTest
@RunWith(SpringRunner.class)
public class JunitTest {
@Test
public void testJunit(){
System.out.println("junit test");
}
}
```
很简单对吧,如果你用了 SpringBoot 简单到好像没啥说的,其实不然,我们来聊聊:
首先,这段代码使用的是 JUnit 4 还是 JUnit5 ? 你可能会觉得,4 和 5 没啥区别吧,用哪个不一样吗?代码能跑不就行了?
不是的,4 和 5 肯定有区别这个不用我说了。能跑没问题,但如果你不管是 4 还是 5 都认为一样,API 混用,甚至乱用,那这时候测试出现的各种报错,导致你很懵逼,而且不知道为什么,一通乱查也不知所然。
上面这段代码其实是 JUnit 4 版本,我们看一下 import 就一目了然了,然而可能你在开发的时候没太注意这里是 4 还是 5
```
import org.junit.Test;
import org.junit.runner.RunWith;
import org.springframework.boot.test.context.SpringBootTest;
import org.springframework.test.context.junit4.SpringRunner;
```
这里确定了,使用的是 4 的版本,这里有几个要注意的点:
- `@Test`的包是`org.junit.Test` ,不要搞错了,因为有好几个同名包
- **需要**`@RunWith(SpringRunner.class)`
- 测试类和测试方法**需要**`public`修饰
我们看下完整的例子:
```java
import org.junit.Test;
import org.junit.runner.RunWith;
import org.springframework.boot.test.context.SpringBootTest;
import org.springframework.test.context.junit4.SpringRunner;
@SpringBootTest
@RunWith(SpringRunner.class)
public class JunitTest {
@Test
public void testJunit(){
System.out.println("junit test ");
}
}
```
这里强调下环境 ,springboot2.2.x 之前支持 JUnit 4
上面有一点提到了 需要 `public` 修饰的问题,这不很正常吗,为什么要强调?
那是因为 JUnit 5 不需要了,我们看一下用 JUnit 5 来实现的同样的例子 (SpringBoot 2.2.x 之后支持 JUnit 5):
```java
import org.junit.jupiter.api.Test;
import org.springframework.boot.test.context.SpringBootTest;
@SpringBootTest
class JunitTest {
@Test
void testJunit5(){
System.out.println("junit5");
}
}
```
这么简单吗?对,就是这么简单,所以我说 4 和 5 不一样。我们来看区别的地方:
- `@Test`的包是`org.junit.jupiter.api.Test`
- **不需要**`@RunWith(SpringRunner.class)`
- 测试类和测试方法**不需要**`public`修饰
我见过很多同学在写测试用例时出现的所谓诡异问题,都是因为他自己都没搞清楚用的是 4 还是 5 的情况下将 4 和 5 混用导致的。
如果你的测试用例是 4 ,可以迁移到 5 了,有关 JUnit 4 迁移到 JUnit5 的话题可以参考这篇文章 ,通过工具可能节省很多时间:https://blog.jetbrains.com/idea/2020/08/migrating-from-junit-4-to-junit-5/
我们再来看一下 pom 依赖这里,你是不是经常看到有关 test 的依赖是这样写的:
```html
org.springframework.boot
spring-boot-starter-test
test
org.junit.vintage
junit-vintage-engine
```
为啥?为什么要排除 junit-vintage-engine ?如果你认真阅读了前文,你应该能猜到为什么了。
***JUnit Vintage*** 是为了兼容 3 和 4 的一个 engine,如果我们的测试代码都用 5 实现,不需要兼容 3 和 4 ,那要它干嘛?当然是干掉呀,哈哈。
但如果你需要兼容,那请不要那么鲁莽。上面的这段 dependency 主要用于 *spring-boot-starter-test* 的 *2.2.x* 和 *2.3.x* 版本中。*spring-boot-starter-test 2.4.x* 版本中,已经不再包含 *junit-vintage-engine* 这个依赖项了
### 常规套路
| Annotations | 描述 |
| --- | --- |
| `@BeforeEach` | 在方法上注解,在每个测试方法运行之前执行。 |
| `@AfterEach` | 在方法上注解,在每个测试方法运行之后执行 |
| `@BeforeAll` | 该注解方法会在所有测试方法之前运行,该方法必须是静态的。 |
| `@AfterAll` | 该注解方法会在所有测试方法之后运行,该方法必须是静态的。 |
| `@Test` | 用于将方法标记为测试方法 |
| `@DisplayName` | 用于为测试类或测试方法提供任何自定义显示名称 |
| `@Disable` | 用于禁用或忽略测试类或方法 |
| `@Nested` | 用于创建嵌套测试类 |
| `@Tag` | 用于测试发现或过滤的标签来标记测试方法或类 |
| `@TestFactory` | 标记一种方法是动态测试的测试工场 |
常规套路不说了,比较简单,一看就明白,说几个有意思的。
### 重复性测试
```java
@RepeatedTest(5)
void repeatTest(TestInfo testInfo,RepetitionInfo repetitionInfo){
System.out.println("repeat:" + testInfo.getDisplayName());
System.out.println("这是第 "+ repetitionInfo.getCurrentRepetition()+ "次重复");
}
```
不用自己写 for 循环了,人家自己带重复的注解,上面两个变量也是自己带的,方便拿到重复信息。
### 基于参数测试
```
@ParameterizedTest
@ValueSource(strings = {"java", "python", "go"})
void containsChar(String candidate) {
assertTrue(candidate.contains("o"));
}
```
如果你的参数少,也不用写循环了,直接写注解里,还挺方便的。
### 超时测试
```
@Test
@Timeout(value = 500, unit = TimeUnit.MILLISECONDS)
void failsIfExecutionTimeExceeds500Milliseconds() {
// fails if execution time exceeds 500 milliseconds
}
```
可以设置 超时的单位和时长
在 assert 中也可以测超时,可以这样写:
```
// timed out after 5 seconds
@Test
void test_timeout_fail() {
// assertTimeout(Duration.ofSeconds(5), () -> delaySecond(10)); // this will fail
assertTimeout(Duration.ofSeconds(5), () -> delaySecond(1)); // pass
}
void delaySecond(int second) {
try {
TimeUnit.SECONDS.sleep(second);
} catch (InterruptedException e) {
e.printStackTrace();
}
}
```
### 并行测试
以上测试用例都是用主线程或者单线程跑的,下面我们玩儿个**多线程并行 test**
首先你要在你的 classpath 下面建一个文件 `junit-platform.properties`
接着加两行配置
```
junit.jupiter.execution.parallel.enabled=true
junit.jupiter.execution.parallel.mode.default=concurrent
```
行了,再跑你的用例就是多线程并行执行的了,当然如果用例本来就设计成单线程的看不出来,那可以使用 Repeat 试一下,比如上面讲过的这个:
```java
@RepeatedTest(5)
void repeatTest(TestInfo testInfo,RepetitionInfo repetitionInfo){
System.out.println("repeat:" + testInfo.getDisplayName());
System.out.println("这是第 "+ repetitionInfo.getCurrentRepetition()+ "次重复");
}
```
上面这个是对一个方法的重复执行并行,有时候我们是想让一个**类中的多个方法并行**,能不能做到?可以,改下配置就好了
```
junit.jupiter.execution.parallel.enabled = true
junit.jupiter.execution.parallel.mode.default = concurrent
junit.jupiter.execution.parallel.mode.classes.default = same_thread
```
如果反过来呢?**多个类并行,类中的方法串行** 也可以,还是改配置:
```
junit.jupiter.execution.parallel.enabled = true
junit.jupiter.execution.parallel.mode.default = same_thread
junit.jupiter.execution.parallel.mode.classes.default = concurrent
```
### MockMVC
你测个 `service` 测个 `dao` 很简单,把 Bean 注入就可以了,`Controller` 怎么测?我们要利用下 MockMVC 了
> “
>
> MockMvc 实现了对 Http 请求的模拟,能够直接使用网络的形式,转换到 Controller 的调用,这样可以使得测试速度快、不依赖网络环境,而且提供了一套验证的工具,这样可以使得请求的验证统一而且很方便。
>
> ”
我们先看一个简单的例子:
```java
import org.junit.jupiter.api.*;
import org.springframework.beans.factory.annotation.Autowired;
import org.springframework.boot.test.autoconfigure.web.servlet.AutoConfigureMockMvc;
import org.springframework.boot.test.context.SpringBootTest;
import org.springframework.test.web.servlet.MockMvc;
import static org.hamcrest.Matchers.containsString;
import static org.junit.jupiter.api.Assertions.assertTrue;
import static org.springframework.test.web.servlet.request.MockMvcRequestBuilders.get;
import static org.springframework.test.web.servlet.result.MockMvcResultHandlers.print;
import static org.springframework.test.web.servlet.result.MockMvcResultMatchers.content;
import static org.springframework.test.web.servlet.result.MockMvcResultMatchers.status;
@SpringBootTest
@AutoConfigureMockMvc
class HelloControllerTest {
@Autowired
private MockMvc mockMvc;
@Autowired
private HelloController helloController;
@Test
public void shouldReturnDefaultMessage() throws Exception {
this.mockMvc.perform(get("/hello"))
.andDo(print())
.andExpect(status().isOk())
.andExpect(content().string(containsString("Hello World")));
}
}
```
解释下没见过的注解:
- `@AutoConfigureMockMvc`:用于自动配置 MockMvc, 配置后 MockMvc 类可以直接注入
此外我们利用 @Autowired 注入了一个 MockMvc 的 Bean 实例。我们通过这个例子来模拟请求 `/hello` 这个 Controller 资源,并且通过判断返回的 content 内容是否包含 `Hello World` 字符串来决定这个用例的执行是否成功。
注意 imports 部分,我们导入了 MockMvcRequestBuilders 的一些静态方法。整个方法就一行代码,解释一下:
- perform : 执行一个请求
- andDo : 添加一个结果处理器,表示要对结果做点什么事情,比如此处使用 print():输出整个响应结果信息
- andExpect : 添加执行完成后的断言
我们看下执行结果:
```yaml
MockHttpServletRequest:
HTTP Method = GET
Request URI = /hello
Parameters = {}
Headers = []
Body = null
Session Attrs = {}
Handler:
Type = com.xiaobox.springbootdemo.controller.HelloController
Method = com.xiaobox.springbootdemo.controller.HelloController#hello(String)
Async:
Async started = false
Async result = null
Resolved Exception:
Type = null
ModelAndView:
View name = null
View = null
Model = null
FlashMap:
Attributes = null
MockHttpServletResponse:
Status = 200
Error message = null
Headers = [Content-Type:"text/plain;charset=UTF-8", Content-Length:"12"]
Content type = text/plain;charset=UTF-8
Body = Hello World!
Forwarded URL = null
Redirected URL = null
Cookies = []
```
我们来看下一个例子
```java
@WebMvcTest
class HelloControllerTest {
@Autowired
private MockMvc mockMvc;
@Autowired
private HelloController helloController;
@Test
public void shouldReturnDefaultMessage() throws Exception {
this.mockMvc.perform(get("/hello"))
.andDo(print())
.andExpect(status().isOk())
.andExpect(content().string(containsString("Hello World")));
}
}
```
你发现我们只是把 class 头上的注解换成了 @WebMvcTest,其实的没变,是的。但却比上一段代码快 3 倍。为什么?
**因为之前的写法会把 Spring 完整的应用上下文全启动了,而 @WebMvcTest 是将测试范围缩小到仅启动 web 层,所以会快。当你只想测试 http 到 controller 这层的时候,可以用 @WebMvcTest 注解。**
你甚至还可以告诉框架只启动某一个 controller 这样更快,比如:`@WebMvcTest(HomeController.class)`
上面是 WebMvcTest 的第一个场景, **我们来看第二个场景:也是测 controller ,但 controller 调用的 service 我们也 mock,不走真正 service 代码逻辑。这在有时你的 service 没准备好,或者不方便直接调用时会很有用**。
```java
@WebMvcTest
class HelloControllerTest {
@Autowired
private MockMvc mockMvc;
@Autowired
private HelloController helloController;
@Test
public void greetingShouldReturnMessageFromService() throws Exception {
Mockito.when(service.greet()).thenReturn("Hello, Mock");
this.mockMvc.perform(get("/greeting")).andDo(print()).andExpect(status().isOk())
.andExpect(content().string(containsString("Hello, Mock")));
}
}
```
上面的代码我们用到了 Mockito, 可能你听过周杰伦一首新歌叫 **Mojito** ,对,Mockito 的命名就是对 **Mojito**(一种传统的古巴高球鸡尾酒)的戏称

简单来说 `Mockito` 是一个 java 做单元测试的 Mock 框架:https://site.mockito.org/
解释下我们上面这行代码 `Mockito.when(service.greet()).thenReturn("Hello, Mock");`
意为:当调用 service 的 greet 方法的时候,返回值为 “Hello Mock”,其实没真调那个方法,就是 Mock 了一下,直接给了个返回值。用英文说就是 :`When the x method is called then return y`
当然 Mockito 在假造上是很有实力的,它有丰富的 API 供你组合使用,有兴趣可以看一看文档和源码注释。
讲到这儿,一定有同学会问,只测 Controller ,那我就用 Postman 就行 了,甚至 curl 都行,为啥要写用例,我不写用例。
哈哈,我相信很多后端同学都没认认真真把用例写完,尤其是 controller 这层的,不装逼,我也是。那我们有必要讨论一下 **到底是用 Postman 还是用 MockMVC ?**
首先说说 MockMVC 的好处:
- 可编程,这就给了你无限的自由空间,想怎么折腾随便你,你是上帝
- 除了写的时候花点时间外,调试的时候速度快,而且可配置,你要想只测 controller,就只启动 controller 的上下文就行了
- 顺便把测试用例写了,测试同学省心了,给自动化测试提供了基础
- 间接提高代码质量
其他的我不说,我就说最后一点。我注意到一个现象,很多开发同学拿测试同学当工具人,自己写的代码自己不怎么测试,直接交给测试让他们提 BUG,然后改,BUG 多也不觉得害臊。开发是爽了,由于代码质量差,整个项目的进度都被拖慢了。你可能会说这是软件质量管理的问题,是规则制定的有问题,如果出 BUG 扣钱就没这事儿了。
我要说的是,在软件开发这个领域,很多事情不是刻板的死规则,即便是制定了这样的规则,也不一定有效。更多的时候是整个团队的文化和风气,领导者有责任将整个研发团队的文化和风气带向正轨。什么是正轨 ?其实我们都知道!我们都知道应该写高质量的代码,bug 少的代码,设计合理的代码,不断重构、不断维护的代码,我们都知道要做好自己的事就会提高整个团队的效率,我们都知道应该写注释、写文档,我们都知道.....
我们都知道,但我们也知道项目时间紧,而且专门有人一遍遍强调 deadLine ,有人关心你的开发进度,关心功能实现了没有,关心老板有没有意见,没有人关心你累不累,关心你几点下的班,关心规划合不合理,关心代码质量高不高,关心与软件真正有关系的一切。所以做一个真正的 软件研发团队的 Leader 不容易,遇到好 Leader 是你的福气。
扯多了,我们回头来看 Postman ,Postman 的好处好像也不用我多说了,确实,如果只是简单的做 Controller 连通测试,用 Postman 一点儿问题没有,也比写程序快,但如果你的需求时有正好是 MockMVC 的优点可以覆盖的地方,那么就动动手,写写程序吧。
### 测试报告
想成一份漂亮的测试报告 ?后端同学说了,整那花里胡哨的有啥用呢,简单一点儿不好吗?
好,简单点儿当然可以,但 UI 带给我们的价值不就是一图胜千言嘛,让无论是前端、后端、测试同学都能一目了然,减轻大脑处理信息的成本。
来,我们先上成果
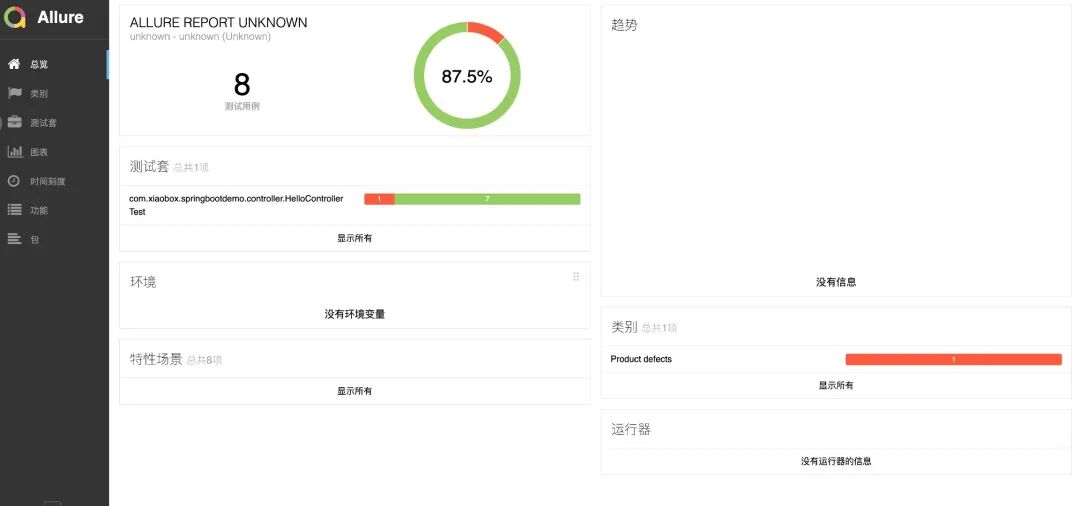
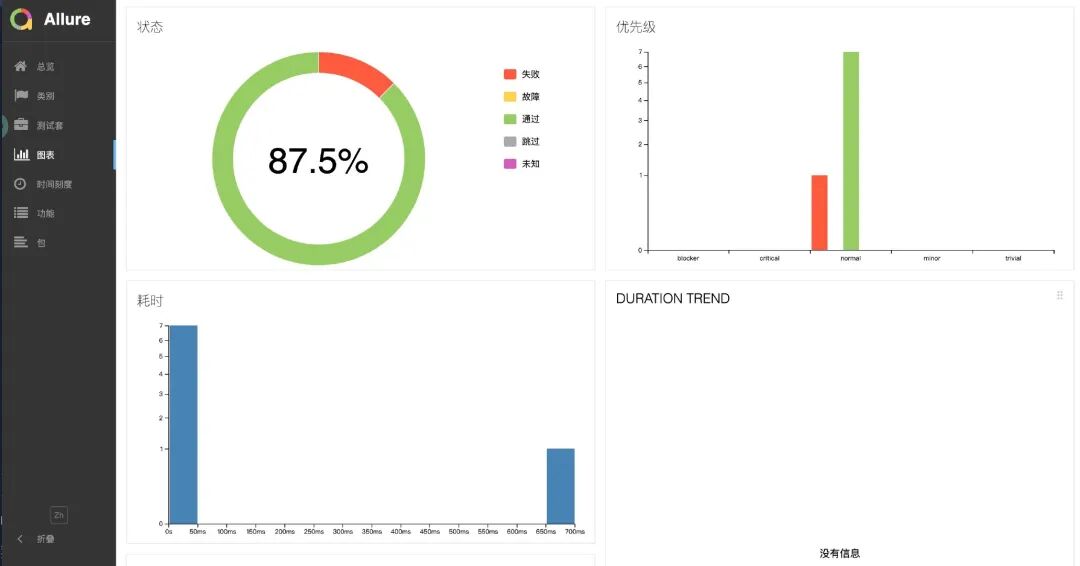
怎么样,还挺好看的吧,我们用的是 Allure 来生成了一个 web 页面,这个页面还有一些简单的交互,整体简洁好看、易用。
**下面我们说一下 Allure 怎么和 JUnit 集成的**
我们仍然使用 SpringBoot 以及 JUnit 5 ,先修改一下 pom.xml 文件,添加依赖
```html
org.springframework.boot
spring-boot-starter-test
test
org.junit.vintage
junit-vintage-engine
io.qameta.allure
allure-junit5
2.18.1
test
```
然而我们添加在 build 中两个 plugin
```html
maven-surefire-plugin
2.21.0
false
-javaagent:"${settings.localRepository}/org/aspectj/aspectjweaver/${aspectj.version}/aspectjweaver-${aspectj.version}.jar"
junit.jupiter.extensions.autodetection.enabled
true
org.junit.platform
junit-platform-surefire-provider
1.2.0
org.aspectj
aspectjweaver
${aspectj.version}
io.qameta.allure
allure-maven
2.11.2
2.4.1
```
我们用 brew 在本地安装一下 Allure (我是 mac 就用这个装了,如果你是其他环境参考后面说的文档)
```bash
brew install allure
```
接着我们调整项目中的测试用例,然后执行:
```
mvn clean test
```
接着找到你项目中 `surefire-reports` 的目录位置
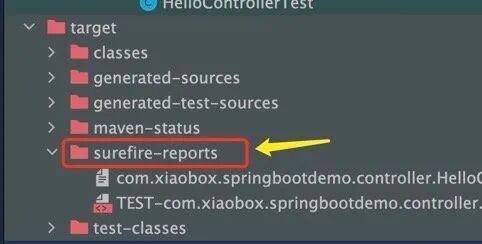
然后执行类似如下命令:
```
# 注意路径改成你自己项目的,这里只是示例
allure serve /home/path/to/project/target/surefire-reports/
```
显示如下信息会自动跳转到浏览器,打开测试报告页面。
是不是很简单?
有关 Allure 安装和使用说明请参考:https://docs.qameta.io/allure-report
有关 JUnit5 就聊到这儿,日常一般的开发是够用了。更多的细节和功能,绍假设 、 断言等,请看官方文档 ,当然备不注它也有错的时候。
## TestNG
TestNG is a testing framework inspired from JUnit and NUnit but introducing some new functionalities that make it more powerful and easier to use, such as:
- Annotations.
- Run your tests in arbitrarily big thread pools with various policies available (all methods in their own thread, one thread per test class, etc...).
- Test that your code is multithread safe.
- Flexible test configuration.
- Support for data-driven testing (with @DataProvider).
- Support for parameters.
- Powerful execution model (no more TestSuite).
- Supported by a variety of tools and plug-ins (Eclipse, IDEA, Maven, etc...).
- Embeds BeanShell for further flexibility.
- Default JDK functions for runtime and logging (no dependencies).
- Dependent methods for application server testing.
上面是 TestNG 的官方介绍,看起来比 JUnit 功能还强大。有了前面 Junit 作为引子, 你再看 TestNG,就好理解的多,因为概念上都差不多,只是功能和细节的不同而已。在这里我们不会展开讲 TestNG 了,但是会讨论一下选型的问题。
如果在 JUnit 5 没出来之前,比如 JUnit4 和 3 的时代,我会毫不犹豫地选择 TestNG,为什么?功能强大,好用啊。但是现在 JUnit5 来了,而且推广的势头也很猛,重要的是从功能上也不输 TestNG,那么怎么选呢?
个人觉得:
- 如果是后端开发,一般还是选 JUnit 5 写单元测试方便简单些,SpringBoot 也内置了 JUnit 开箱即用,从生态和社区上讲即使有坑也好解决些
- 如果是搞自动化测试的同学,更多的可能还是用 TestNG 方便些,之前很多遗留项目都是用的 TestNG,另外它和自动化测试工具 selenium 的搭配也早已深入人心。从设计理念到 API,都更符合测试同学的思维。
## 参考
- https://testng.org/doc/
- https://spring.io/guides/gs/testing-web/
- https://cloud.tencent.com/developer/article/1779117
- https://blog.csdn.net/qq\_39466683/article/details/121911310
- https://tonydeng.github.io/2017/10/10/junit-5-annotations/
- https://junit.org/junit5/docs/current/user-guide/
- https://www.liujiajia.me/2021/5/14/why-exclude-junit-vintage-engine-by-default